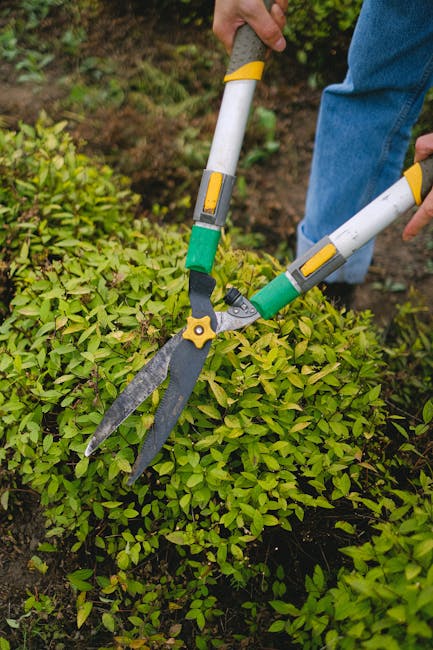
Artsdepot hedge trimming before and after by gardeners
If you have ever looked at a tired, uneven hedge and wondered what it could look like with a proper professional trim, you are in the right place. Artsdepot hedge trimming before and after by gardeners is really about more than a neat finish. It is about restoring shape, improving growth, and making the whole front or boundary of a property feel cared for again. In a busy area, a hedge can quietly get out of hand. Then one morning it becomes impossible to ignore.
In this guide, we break down what gardeners actually do before and after hedge trimming, why the transformation matters, how the work is approached safely, and what a good result should look like. You will also find practical tips, a realistic checklist, and a few things people often miss until the clippings are already in a pile on the drive. Let's face it, hedges have a way of making drama out of nothing.
Why Artsdepot hedge trimming before and after by gardeners matters
The before-and-after part is not just for visual satisfaction, though that is a big part of it. A hedge that is trimmed properly can change the feel of a space at street level, around a boundary, or beside a path. Around Artsdepot and similar busy urban spaces, tidy planting often frames the property, softens hard edges, and helps a garden look intentional rather than left to its own devices.
What really matters is the balance between appearance and plant health. A hedge trimmed at the right time, with the right shape, and with enough care not to scalp the outer growth, tends to recover better and keep its structure. A poor cut can leave it thin, patchy, or blunt-looking for months. Not ideal.
There is also the practical side. Overgrown hedges can block light, narrow footpaths, hide signs of boundary lines, and make maintenance harder in every direction. When gardeners complete a hedge trim well, the change is visible instantly, but the longer-term value comes from easier upkeep, better airflow, and healthier growth through the season.
If you are trying to plan wider garden work at the same time, it can help to think about hedge trimming as part of a full maintenance picture. Many homeowners pair it with routine garden maintenance, and in some cases with lawn care or garden clearance if the whole space needs a reset.
How Artsdepot hedge trimming before and after by gardeners works
Good hedge trimming starts before any cutting begins. A gardener will usually inspect the hedge type, growth pattern, density, height, and any weak or damaged areas. That early assessment matters because not every hedge responds the same way. Laurel, privet, beech, and conifer hedges all behave differently, and the "one size fits all" approach usually ends up looking a bit lazy, if we are honest.
The trimming itself is normally done in stages. First comes the outline, then the face, then the top, and finally the detail work that makes the hedge line look straight and controlled. After that, the cleanup is just as important as the cutting. A tidy finish is part of the service, not an extra. Nobody wants clippings sitting in borders, on decking, or caught under the car tyre for the next three days.
The before-and-after effect is easiest to spot when the hedge has become leggy or uneven. Before trimming, you may notice shoots sticking out at odd angles, brown patches near the base, or a hedge that leans into the path. After trimming, the shape becomes clearer, the line becomes cleaner, and the hedge often looks lighter and healthier. Sometimes the transformation is subtle. Other times, it is a proper "why did we leave it so long?" moment.
A sensible gardener will also consider surrounding features such as fencing, walls, paving, sheds, and any nearby planting. For example, a hedge beside a patio or deck needs careful handling so the cut does not make the whole area feel bare. If the boundary work is part of a bigger outdoor refresh, you may also want to look at landscaping support or garden design improvements to make the result feel complete rather than piecemeal.
Key benefits and practical advantages
There are plenty of reasons to keep hedges trimmed regularly, and not all of them are obvious from the street.
- Better kerb appeal: A neat hedge instantly improves the presentation of a home or commercial frontage.
- Healthier growth: Careful trimming encourages denser growth and reduces the chance of ragged, weak outer shoots.
- More light and space: Tighter hedges can open up paths, windows, and seating areas.
- Safer access: Overgrown hedges can obstruct walkways, driveways, and sight lines.
- Easier maintenance: Once a hedge is brought back into shape, ongoing upkeep is usually simpler.
- Cleaner boundaries: A defined hedge line makes the garden feel more finished and orderly.
The biggest practical advantage is often time. A hedge that is maintained in smaller, regular trims usually takes less correction than one left to become heavy and woody. In other words, a little upkeep now can save you a lot of wrestling later. That is true for most garden jobs, actually.
There is also a comfort factor. When a hedge is clipped back neatly, the garden can feel calmer and more open. You notice the difference on a damp morning, when the light comes in better, or in late afternoon when a tidy edge makes everything feel sharper. Small thing, maybe. But people notice.
Who this is for and when it makes sense
Artsdepot hedge trimming before and after by gardeners makes sense for anyone dealing with hedges that have started to drift out of shape. That includes private homeowners, landlords, letting agents, small businesses, and property managers who need reliable presentation without constant fuss.
It is especially useful if:
- the hedge has grown too wide for the available space
- the top is uneven or the sides are bulging out
- the hedge is blocking windows, gates, or pathways
- you are preparing a property for photos, viewing, or sale
- you want to restore order after a period of missed maintenance
- the hedge forms part of a larger garden refresh
It also makes sense when you want the hedge to work with the rest of the garden instead of dominating it. For example, a tidy hedge can make a small outdoor space feel more structured, especially when paired with well-kept decking areas or planned planting. The hedge becomes a frame, not a problem.
There are cases where trimming should be approached cautiously. If a hedge is very old, patchy, or recently stressed by heat or drought, a severe cut may not be the best move. A good gardener will say that plainly rather than pretending every hedge wants the same treatment. That honesty matters.
Step-by-step guidance
Here is a practical view of how a professional hedge trim usually unfolds.
- Inspect the hedge. Check the species, thickness, height, and any signs of disease, dead wood, or uneven growth.
- Plan the shape. Decide whether the hedge needs a light tidy, a formal squared edge, or a softer natural profile.
- Protect nearby surfaces. Cover paths or delicate planting where needed, and make sure access is safe.
- Trim from the correct angle. The hedge is usually shaped slightly narrower at the top than the base so light reaches the lower growth.
- Check the finish from a distance. Step back often. What looks straight up close can look wavy from five metres away.
- Clear all clippings. Dispose of green waste neatly and leave the area tidy.
- Review the aftercare. Watering, feeding, or follow-up maintenance may be helpful depending on the hedge type and season.
A real before-and-after transformation often comes from the details between each step. The cut line should read cleanly, not hacked. The bottom should not be stripped bare unless that is genuinely appropriate for the hedge type. And the cleanup should leave the area ready to use, not half-finished.
Some hedges only need a light trim. Others need a more restorative approach. The trick is knowing which is which. That is where experience saves time, and frankly, a few sore arms.
Expert tips for better results
These are the small decisions that separate a decent hedge trim from a really good one.
- Trim with the hedge's natural growth in mind. Don't force a rigid shape onto a plant that wants a softer outline.
- Keep the base slightly wider than the top where suitable. This helps light reach the lower branches.
- Work in stages on overgrown hedges. A big reduction is often safer when done over more than one visit, depending on the hedge type.
- Use clean, sharp tools. Blunt blades tear growth and leave a rough finish.
- Look at the hedge from different angles. Front, side, and even from across the street if possible.
- Watch the weather. Very wet or very windy conditions can make accurate cutting harder.
One underrated tip: do not judge the hedge only by the first cut line. Step back, breathe, then check again. It sounds simple, but it saves a surprising number of lopsided finishes. The hedge will not complain, but you will see it later.
For larger gardens or commercial grounds, it can also help to combine hedge work with a broader seasonal plan. Services like general service planning and ongoing maintenance visits can keep things on track, rather than waiting until the hedge starts shouting for attention.
Common mistakes to avoid
Most hedge-trimming problems come from rushing or overcutting. That is the short version. The longer version is below.
- Cutting too much at once: This can expose bare stems or stress the hedge.
- Making the hedge top-heavy: A hedge that is wider at the top can shade itself out at the bottom.
- Ignoring hidden issues: Dead sections, disease, or pest damage should be noticed early.
- Leaving clippings behind: They look untidy and can smother plants beneath.
- Using the wrong season or timing: Some hedges do better with certain trimming windows than others.
- Forgetting about access and safety: Ladders, power tools, and high hedges need care.
Another easy mistake is assuming a hedge should always look boxy. Sometimes that is correct. Sometimes it looks heavy and stiff. A bit of judgement goes a long way. To be fair, the hedge usually tells you what it wants if you stand back and actually look at it.
If the hedge sits near a driveway, boundary wall, or taller trees, the job may need extra attention to avoid accidental damage. In those cases, broader work such as tree care and removal support may be relevant too, especially if overhanging growth is part of the issue.
Tools, resources and recommendations
You do not need a shed full of specialist kit to understand what a good hedge trim involves, but the right tools do matter. Professional gardeners commonly rely on hedge trimmers, secateurs, loppers, hand shears, protective gloves, eye protection, and suitable waste bags or collection methods. For larger or denser hedges, powered equipment is often the practical choice.
If you are comparing services, look for more than a shiny before-and-after photo. Ask how they approach hedge type, waste removal, access issues, and aftercare. A good provider should be comfortable discussing all of that in plain English. Not fancy jargon. Plain English.
You may also want to think about how the hedge trim fits into the rest of the property. For example:
- if the boundary area is cluttered, a tidy-up may pair well with green waste clearance
- if the garden needs a consistent look, pair hedge work with lawn and edge maintenance
- if the outdoor area is being improved overall, consider coordinating the hedge trim with broader landscaping work
As a rule, the best results come from proper sequencing. Clear the area, trim the hedge, inspect the finish, then complete any final tidy-up. It sounds almost too simple, but that order prevents a lot of mess and second-guessing.
Law, compliance, standards, or best practice
For hedge trimming, the most relevant guidance is usually practical best practice rather than complicated paperwork. In the UK, gardeners and property owners should still think carefully about safety, neighbourly boundaries, waste handling, and any local expectations around tidiness and access. If a hedge borders a pavement, driveway, or shared access route, it is sensible to ensure work does not create a hazard or obstruction.
From a professional point of view, sensible best practice usually includes:
- working safely at height where needed
- using appropriate protective equipment
- checking for hidden obstacles before cutting
- disposing of green waste responsibly
- avoiding unnecessary damage to nesting wildlife or active habitats
- being clear about what the trim will and will not include
Where local rules or timing restrictions may affect work, a reliable gardener should be cautious rather than guessy. If there is uncertainty about timing, wildlife, or access, it is better to pause and assess properly. That is just good practice. No drama needed.
Safety matters too. If you are hiring help, it is reasonable to expect clear information about insurance, risk management, and the general approach to protecting people and property. A company that is transparent about this usually inspires confidence for good reason. You can also review pages such as insurance and safety information and health and safety policy details if you want extra peace of mind before booking.
Options, methods, or comparison table
Not every hedge needs the same approach. Here is a simple comparison that may help you decide what kind of trim is likely to suit the job.
| Method | Best for | What it achieves | Main caution |
|---|---|---|---|
| Light tidy trim | Regularly maintained hedges | Keeps the shape crisp and controlled | May not solve major overgrowth |
| Moderate reduction | Hedges that have started to spread or rise too far | Restores balance and improves access | Should be done with care to avoid bare patches |
| Restorative reshaping | Very overgrown or uneven hedges | Brings the hedge back into a workable form | May need staged visits depending on species and condition |
| Full garden reset support | Properties needing a broader tidy-up | Creates a cleaner, more finished outdoor space | Usually works best alongside other maintenance tasks |
The best option depends on the hedge itself, not just how messy it looks from the road. A hedgerow that has been neglected for years may need a gentler strategy than a young hedge that simply got ahead of schedule. That difference matters, really matters.
Case study or real-world example
Here is a realistic example based on the kind of work gardeners often carry out around busy properties. A front hedge had grown unevenly over a season, with one side leaning into the pavement and the top line no longer matching the fence. From the front, it looked a bit tired. From the side, it was worse. The clippings had been left to dry on the ground, and the lower growth was getting shaded out.
The gardener started by clearing access and checking the hedge from both directions. Then the outer line was trimmed back carefully rather than heavily. The top was re-leveled, the sides were shaped so the hedge tapered slightly, and all debris was removed at the end. The result was not dramatic in a flashy way. It was better than that. The hedge looked settled, balanced, and deliberately maintained.
That kind of before-and-after difference is easy to underestimate until you see it in person. The garden feels wider. The entrance looks more welcoming. The hedge stops shouting and starts working as part of the property again. Simple, but it changes the whole mood.
Practical checklist
Use this quick checklist before and after hedge trimming.
- Confirm the hedge type and current condition
- Decide whether a light trim or more structured reshaping is needed
- Check for nesting birds, fragile growth, or weak sections
- Clear access around the hedge
- Protect nearby paths, surfaces, and plants where sensible
- Trim evenly and step back to check the shape often
- Remove all clippings and green waste
- Inspect the hedge line for missed patches or uneven areas
- Plan the next maintenance interval before the hedge gets unruly again
Quick expert summary: a strong hedge trim is not about cutting the most; it is about cutting the right amount, in the right shape, at the right time, and leaving the space cleaner than you found it. That is the standard worth aiming for.
If you are comparing professional support for hedge work, you may also find it useful to review pricing and quote information, or to look through the wider services overview to see how hedge trimming fits into a broader garden plan.
Conclusion
Artsdepot hedge trimming before and after by gardeners is one of those jobs where the visual change is obvious, but the practical value goes deeper. A well-trimmed hedge improves presentation, helps plant health, and makes everyday garden use easier. It can also turn a space that feels crowded or neglected into one that feels calm and cared for.
The main thing to remember is that good hedge work is thoughtful work. It starts with observation, not just cutting. It ends with a tidy finish, not a half-done pile of clippings. And if the hedge needs a gentler, staged approach, that is fine. Better to do it properly than quickly.
When done well, the result is quietly satisfying. The hedge looks right. The garden breathes a little more. And somehow the whole property feels more settled for it.
Get a free quote today and see how much you can save.
Frequently Asked Questions
What does Artsdepot hedge trimming before and after by gardeners actually mean?
It refers to the visible transformation and maintenance process of trimming a hedge so it looks neater, healthier, and better shaped after professional gardening work.
How do I know if my hedge needs trimming or a bigger reshaping job?
If the hedge is only slightly untidy, a light trim is often enough. If it has become wide, uneven, patchy, or difficult to manage, it may need more structured reshaping.
Will hedge trimming damage my plants?
It should not if it is done properly. Careful trimming follows the hedge's growth habit and avoids overcutting into bare, weak, or stressed sections.
How long does a hedge trimming job usually take?
That depends on the hedge length, height, density, and access. A small tidy-up may be fairly quick, while larger or overgrown hedges take longer and may need more than one visit.
What should the after result look like?
The hedge should look even, balanced, and cleanly finished. The line should be consistent, the clippings removed, and the surrounding area left tidy.
Can hedge trimming be done in wet weather?
Sometimes, but it is not always ideal. Wet conditions can make cutting less precise and cleanup more awkward, so many gardeners prefer drier weather where possible.
Why do gardeners trim hedges slightly narrower at the top?
This helps light reach the lower growth, which supports a fuller hedge from top to bottom. It is a simple detail, but it makes a real difference over time.
Is hedge trimming part of general garden maintenance?
Yes, very often. Hedge trimming is commonly included within ongoing maintenance because it keeps the garden looking controlled and prevents larger problems from building up.
What happens to the hedge clippings afterwards?
They are usually collected and removed as green waste, or taken away as part of the service. A proper finish should not leave debris scattered around the garden.
Can hedge trimming be combined with other garden work?
Absolutely. It often works well alongside lawn care, clearance, landscaping, or general tidy-up work, especially if the property needs a broader refresh.
How often should a hedge be trimmed?
It depends on the hedge type and the look you want to keep. Some hedges need several trims a year, while others only need periodic maintenance. A gardener can advise based on the specific plant.
How do I choose a gardener for hedge trimming?
Look for someone who understands hedge type, safety, waste removal, and aftercare. Clear communication matters too. You want a practical, tidy result, not just someone with a trimmer and a hurry.